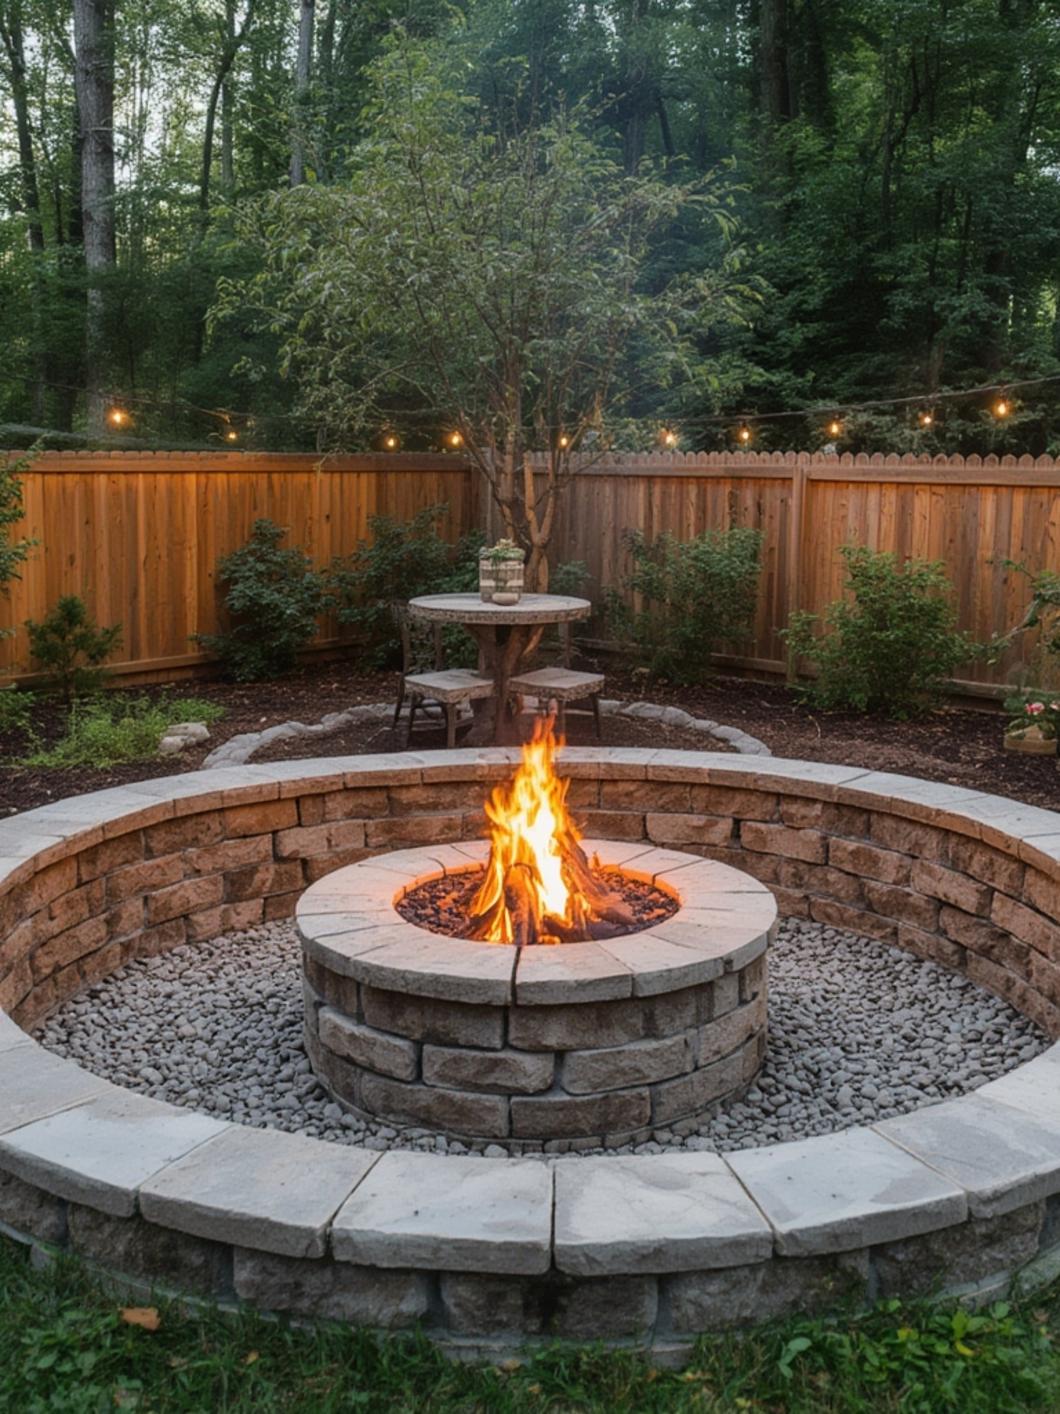
Build Your Dream Outdoor Oasis: The Ultimate Guide to a DIY Backyard Fire Pit
There’s something undeniably magical about gathering around a fire—the crackling sounds, the dancing flames, the warmth that draws people together. Imagine creating that magic in your own backyard. A DIY Backyard Fire Pit isn’t just a construction project; it’s an investment in memories, cozy evenings, and increased home value. Whether you’re a seasoned DIYer or a curious beginner, transforming your outdoor space is more achievable than you think. With the right guidance and reliable fire pit plans, you can build a safe, stunning focal point for gatherings, s’mores, and quiet reflection. This guide breaks down every step, from materials to maintenance, ensuring your project is a resounding success.
Materials & Supplies
Before breaking ground, gather your arsenal. Here’s a comprehensive checklist:
- Core Materials: DIY Backyard Fire Pit
* Firebricks or refractory bricks (for the inner fire chamber)
* Retaining wall blocks, natural stone, or poured concrete (for the outer structure)
* Gravel (for drainage base)
* Sand (for leveling)
* Construction adhesive (mortarless systems) or mortar mix (for masonry)
* Metal fire ring (optional, for enhanced durability and containment)
- Tools:
* Shovel & rake
* Level (crucial!)
* Tamper or hand compactor
* Wheelbarrow (for mixing concrete/mortar)
* Mason’s line & stakes
* Rubber mallet
* Safety gear (gloves, goggles)
- Optional Alternatives:
* Above-ground option: DIY Backyard Fire Pit Use a pre-fabricated fire pit bowl kit for a simpler build.
* Fuel source: Consider a gas burn kit insert for a cleaner, controllable flame (requires professional gas line installation).
* Finish: Use heat-resistant paint or leave natural stone for an organic look.
Timing / Growing Schedule (Project Timeline)
Building a fire pit is a weekend project with lasting rewards. Here’s a realistic timeline:
- Prep & Planning (1-2 Weeks): DIY Backyard Fire Pit This is the most critical phase. Research local building codes and permit requirements. Finalize your fire pit plans, select materials, and source them (check home improvement stores or online for potential savings using home improvement coupons). Mark the location and clear the area.
- Construction (1-2 Days): For a standard in-ground or above-ground stone pit, expect to spend a full day on excavation and base preparation and another day on block/stone assembly and final detailing.
- Curing & First Use (1-7 Days): If you used mortar, allow it to cure fully (usually 24-72 hours). For concrete bases, cure for at least a week. Your first small fire should be after this period. The “growing” result is immediate enjoyment once built, but the true benefit—becoming the heart of your outdoor living space—grows with each seasonal use DIY Backyard Fire Pit.
Step-by-Step Instructions
Follow these actionable steps for a professional result.
1. Location & Layout: DIY Backyard Fire Pit Choose a spot at least 10 feet from structures and overhanging trees. Use a garden hose to outline your desired shape (circle, square). Level the ground.
2. Excavate & Build Base: Dig a hole 12 inches deep and 6 inches wider than your pit’s footprint. Fill with 4-6 inches of gravel, tamp it down firmly, and add a 1-inch sand layer. Use your level meticulously.
3. Assemble the Walls: Beginning at your layout line, start laying your first course of stones or blocks. Use a mason’s line to keep them straight and level. Apply construction adhesive between courses if recommended by your block manufacturer. Pro Tip: Dry-fit all stones for the first two courses before applying any adhesive to ensure a perfect fit.
4. Create the Fire Chamber: If using firebricks inside, build a separate, smaller inner wall (about 12-18 inches high) with a 1-2 inch air gap between it and the outer wall for ventilation.
5. Cap & Finish: Place coping stones or a solid cap on top of the outer walls. Sweep away excess sand or adhesive DIY Backyard Fire Pit.
6. Final Touches & Safety: Backfill any gaps with soil or pea gravel. Install a spark screen if desired. Keep a fire extinguisher and water source (hose or bucket) nearby at all times.
When constructing your DIY Backyard Fire Pit, patience with leveling and following proven fire pit plans is non-negotiable for safety and aesthetics.
Nutritional Benefits / Advantages (Holistic Value)
While a fire pit doesn’t provide nutritional “benefits” in a dietary sense, its advantages are profoundly wholesome:
- Mental & Social Wellness: It promotes unplugged connection, reduces stress, and creates a serene outdoor sanctuary.
- Cost Efficiency: DIY Backyard Fire Pit A DIY build saves hundreds compared to professional installation. Usingcoupons for materials can lower costs further.
- Property Value: A well-built fire pit is a sought-after landscaping feature that can boost curb appeal.
- Environmental Consideration: Compared to propane or gas fireplaces, a properly managed wood fire can have a lower carbon footprint, and ash can be used as a garden soil amendment (once fully cooled and mixed).
Tips, Alternative Methods, or Gardening Advice
- Small Spaces: Opt for a compact, above-ground metal fire bowl on a stone pad.
- Urban/No-Grass Areas: Build on a concrete patio using a fire-resistant pad and a portable pit.
- Gas vs. Wood: Gas offers convenience and less smoke; wood provides authentic ambiance and sound. Your fire pit plans should specify which you’re building.
- Organic “No-Mortar” Method: Use the dry-stack technique with tightly fitted stones, relying on gravity and weight for stability. Ideal for DIY beginners.
- Seasonal Use: In winter, protect the pit with a heavy-duty cover. In fire-prone areas, have an ember guard and never leave a fire unattended DIY Backyard Fire Pit.
Common Mistakes to Avoid

1. Ignoring Clearances: DIY Backyard Fire Pit Building too close to structures, fences, or trees is a major fire hazard. Solution: Maintain at least a 10-15 foot clearance, check local codes.
2. Poor Base Preparation: A non-compacted, uneven base leads to a shifting, unsafe pit. Solution: Tamp each layer of gravel/sand thoroughly. Use a level constantly.
3. Incorrect Ventilation: Forgetting air gaps in masonry walls causes smoking issues. Solution: Build an inner and outer wall with a vent gap, or use a metal fire ring with vents.
4. Using Non-Fire-Resistant Materials: DIY Backyard Fire Pit Regular bricks or landscape rocks can shatter from heat. Solution: Always use firebricks for the interior and heat-rated materials for the exterior.
5. No Safety Gear: Handling stones and mortar without protection is dangerous. Solution: Wear sturdy gloves, safety glasses, and a mask when cutting or mixing.
Storage / Maintenance Tips
- Routine Care: After each use, let ashes cool completely (24+ hours). Scoop them out with a metal shovel and dispose of in a metal container. A small amount of ash can beneficially be scattered in garden beds.
- Deep Clean: Annually, scrub the interior with a stiff brush and mild detergent. Rinse thoroughly.
- Weather Protection: Use a snug-fitting, waterproof cover to shield from rain, snow, and leaves during off-seasons or prolonged inactivity.
- Inspect: Each season, check for cracks in firebricks or mortar joints. Repair with high-temperature mortar if needed.
- Store Tools: Keep your fire poker, shovel, and cover in a dry outdoor storage box or garage.
Conclusion
Building a DIY Backyard Fire Pit is a profoundly rewarding project that combines craftsmanship with the promise of future gatherings. By meticulously following proven fire pit plans, prioritizing safety in every step, and committing to simple maintenance, you create more than a fixture—you forge an extension of your home where stories are shared and peace is found. The glow of your own handcrafted fire pit is the ultimate payoff for careful planning and DIY grit. Start your project today, and soon, you’ll be the host with the warmest, most inviting spot in the neighborhood DIY Backyard Fire Pit.
FAQs
1. Do I need a building permit for a DIY fire pit?
Often, yes. Permit requirements vary widely by municipality, especially for permanent, in-ground pits. Always call your local building department before starting. Portable, above-ground units typically don’t require permits.
2. How much does a DIY fire pit cost?
A basic above-ground stone or metal pit can cost $150-$300. A more elaborate custom masonry pit with premium stone ranges from $500-$1,500+. Using fire pit plans and shopping sales can significantly control costs.
3. What’s the safest fuel source for a beginner?
A propane or natural gas fire pit kit is generally safer and cleaner for beginners due to controllable flames and no flying sparks or embers. Wood requires more active management and clearance.
4. How big should my fire pit be?
For comfortable seating, an interior diameter of 36-42 inches is ideal. Height should be 12-18 inches above the seat surface. Ensure your fire pit plans scale to your space.
5. Can I build a fire pit on a wooden deck?
Never directly. You must use a commercially rated fire pit pad (made of concrete, stone, or composite materials) that extends at least 24 inches beyond the pit on all sides. A professional-grade, elevated gas fire pit designed for decks is the only safe option.